Hey there! As a supplier of PP Honeycomb Panels, I've seen my fair share of installation challenges, especially when it comes to ensuring the flatness of these panels. In this blog, I'll share some tips and tricks on how to achieve that perfect flat finish during installation.
Understanding PP Honeycomb Panels
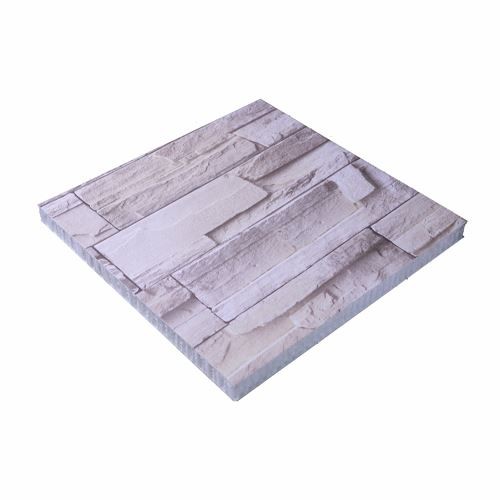
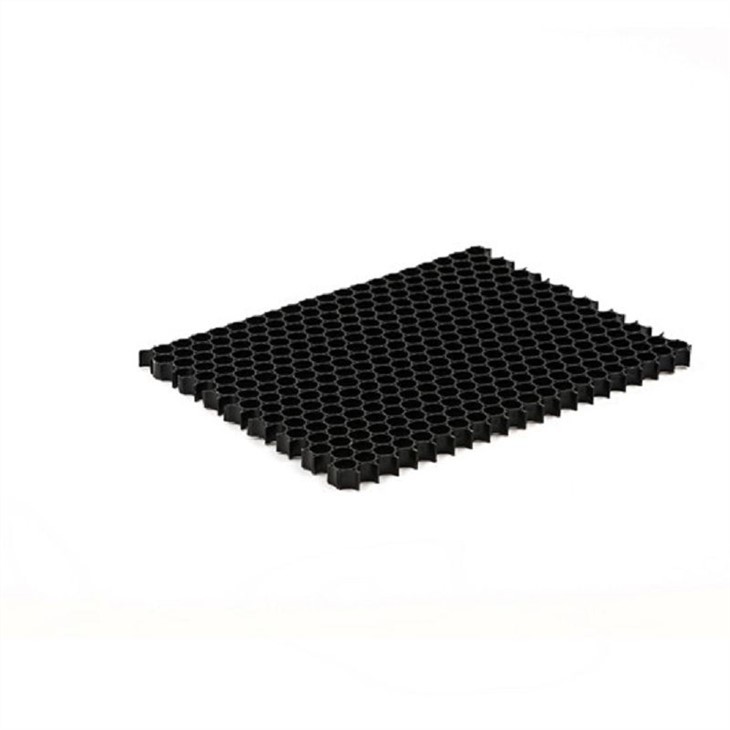
First off, let's talk a bit about what PP Honeycomb Panels are. These panels are made from polypropylene, a thermoplastic polymer known for its lightweight, durability, and chemical resistance. The honeycomb structure in the middle gives the panels high strength-to-weight ratio, making them ideal for a variety of applications, from construction to packaging. You can check out more about the Thermoplastic Honeycomb Core on our website.
Why Flatness Matters
Flatness is crucial for several reasons. For one, it affects the overall aesthetic of the finished project. If the panels aren't flat, the surface will look uneven and unprofessional. Secondly, flat panels ensure proper fit and alignment, which is essential for structural integrity. In applications like building facades or interior partitions, uneven panels can lead to gaps and leaks, compromising the functionality of the structure. And if you're using the panels for packaging, flatness ensures that the contents are protected and the package looks presentable.
Pre-Installation Preparation
Before you start installing the PP Honeycomb Panels, there are a few things you need to do to ensure flatness.
Site Inspection
The first step is to inspect the installation site. Make sure the surface where you'll be installing the panels is clean, dry, and level. Any bumps, dents, or debris on the surface can cause the panels to sit unevenly. If the surface is not level, you may need to use a leveling compound or shims to create a flat base.
Panel Selection
Choose high-quality panels that are free from defects. Inspect each panel for warping, cracks, or other damage before installation. If you notice any issues, set the panel aside and don't use it. Using damaged panels can lead to uneven installation and compromise the flatness of the entire project.
Measuring and Cutting
Accurate measuring and cutting are essential for ensuring a proper fit and flat installation. Use a sharp utility knife or a saw to cut the panels to the required size. Make sure to measure twice and cut once to avoid mistakes. If you're cutting multiple panels, use a template to ensure consistency.
Installation Techniques
Now that you've prepared the site and the panels, it's time to start installing them. Here are some techniques to ensure flatness during installation.
Adhesive Application
When using adhesive to install the panels, make sure to apply it evenly. Use a trowel or a notched spreader to apply the adhesive in a thin, uniform layer. Avoid applying too much adhesive, as this can cause the panels to shift and create unevenness. Make sure to follow the manufacturer's instructions for the adhesive, including the drying time and application temperature.
Mechanical Fasteners
If you're using mechanical fasteners, such as screws or nails, make sure to space them evenly. Follow the manufacturer's recommendations for the spacing and size of the fasteners. Use a drill or a screwdriver to insert the fasteners at a 90-degree angle to the panel surface. Make sure not to overtighten the fasteners, as this can cause the panels to warp.
Alignment
During installation, use a level or a straightedge to check the alignment of the panels. Make sure the panels are flush with each other and the surrounding surfaces. If you notice any misalignment, adjust the panels immediately. You can use shims or spacers to correct small alignment issues.
Sequential Installation
Install the panels in a sequential manner, starting from one corner and working your way across. This helps to ensure that the panels are installed evenly and that any minor variations in the panel size or shape are distributed evenly across the surface. Avoid skipping panels or installing them out of order, as this can lead to unevenness.
Post-Installation Checks
Once you've installed all the panels, it's important to do a final check to ensure flatness.
Visual Inspection
Visually inspect the surface of the installed panels for any signs of unevenness. Look for bumps, dents, or gaps between the panels. If you notice any issues, mark them and make the necessary adjustments.
Measuring
Use a measuring tape or a straightedge to measure the flatness of the surface. Measure the distance between the panel surface and a straightedge at several points across the surface. The maximum allowable deviation from flatness will depend on the application, but generally, a deviation of less than 1/8 inch over a 4-foot span is considered acceptable.
Touch-up
If you find any areas that are not flat, you can use a sanding block or a file to smooth them out. Make sure to sand gently to avoid damaging the panel surface. You can also use a filler or a putty to fill in any small gaps or holes.
Common Mistakes to Avoid
Here are some common mistakes that can lead to unevenness during installation and how to avoid them.
Incorrect Adhesive Application
As mentioned earlier, applying too much or too little adhesive can cause the panels to shift and create unevenness. Make sure to follow the manufacturer's instructions for the adhesive application.
Over-tightening Fasteners
Overtightening screws or nails can cause the panels to warp. Make sure to use the correct size and type of fasteners and to tighten them just enough to secure the panels in place.
Poor Site Preparation
If the installation site is not clean, dry, and level, the panels will not sit evenly. Make sure to prepare the site properly before installation.
Improper Handling
Handling the panels roughly during installation can cause them to warp or damage. Make sure to handle the panels with care and avoid dropping or bending them.
Conclusion
Ensuring the flatness of PP Honeycomb Panels during installation is crucial for the success of your project. By following the tips and techniques outlined in this blog, you can achieve a professional-looking, flat finish. Remember to prepare the site and the panels properly, use the right installation techniques, and do a final check to ensure flatness. If you have any questions or need more information about our PP Honeycomb Panels, feel free to reach out to us. We're here to help you with your next project. Whether you're working on a small DIY project or a large commercial installation, our high-quality Honeycomb-building-panels are the perfect choice. Contact us today to discuss your requirements and get a quote.
References
- Manufacturer's installation guides for PP Honeycomb Panels
- Industry standards for panel installation and flatness requirements